
Glove guide – Hand protection when handling histology samples
Histology, the science dedicated to studying biological tissues, relies on the analysis of tissue samples collected from human patients, animals, or plants, requiring various preparation steps involving handling potentially hazardous chemicals.
Given these exposures, wearing appropriate single-use gloves is essential to protect operators. In this article, we guide you through a standard staining protocol — haematoxylin-eosin staining — focusing on hand protection at each stage of the process.
Handling histology samples: What are the risks?
Histological analyses require manual intervention on samples as well as the use of aggressive chemical reagents for tissue fixation, staining, and preservation.
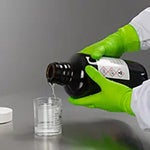
The primary risks faced by laboratory operators include:
- Chemical risks: Contact with solvents (formaldehyde, xylene, alcohols), fixatives, and dyes.
- Biological risks: Handling potentially infectious samples or those containing pathogens.
- Mechanical risks: Injuries related to handling microtomes and glass slides.
To mitigate these risks, it is crucial to select protective single-use gloves suited to each stage of the process.
Browse through our glove assortment here.
Step 1 - Tissue fixation and embedding: Beware of formaldehyde
Fixation is a crucial step to preserve tissue integrity and solidify samples before embedding them in paraffin and sectioning them into ultra-thin slices. Formaldehyde, in which the samples are immersed, is the most commonly used fixative.
Formaldehyde is a toxic reagent upon skin contact, capable of inducing genetic mutations and causing cancer.
Selecting a single-use glove suitable for handling this reagent is therefore essential for operator safety:
- Nitrile gloves tested against chemical exposure, with acceptable permeation breakthrough time for formaldehyde.
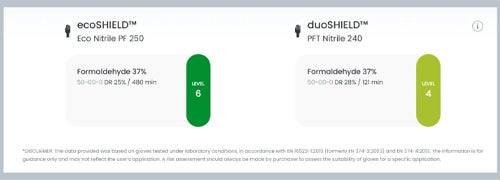
The above example of permeation breakthrough time for ecoSHIELD™ Eco Nitrile PF 250 gloves (0.10 mm thick) and duoSHIELD™ PFT Nitrile 240 gloves (0.08 mm thick) illustrates the importance of single-use glove thickness for improved chemical permeation resistance. The thicker the glove, the better the protection!
- Gloves with the lowest possible AQL to minimise the risk of defective gloves with micro-holes.
- Virus-tested gloves for additional protection.
- Gloves with extended cuffs (at least ≥250 mm) to fully cover wrists when handling formaldehyde baths.
After fixation, samples are dehydrated in successive alcohol baths before being embedded in paraffin to facilitate microtome sectioning. The resulting slices are then placed on histology slides.
Step 2 - Deparaffinisation and rehydration: Exposure to toxic solvents
Before staining, paraffin must be removed from histological sections. To achieve this, slides are passed through successive solvent baths, the most commonly used being xylene.
Once again, operators face exposure risks due to potential spills during solution preparation or when transferring slides between baths.
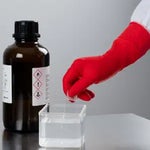
To mitigate these risks, it is essential to select high-performance single-use gloves for handling this solvent:
- Multi-layered nitrile gloves for enhanced chemical permeation resistance.
- Extended glove cuffs (≥300 mm) to fully protect forearms when transferring samples.
- Gloves tested against xylene, with sufficient permeation breakthrough time for the task performed.
Once paraffin is removed, samples are progressively rehydrated in decreasing alcohol concentrations down to water, preparing the tissues for stain absorption.
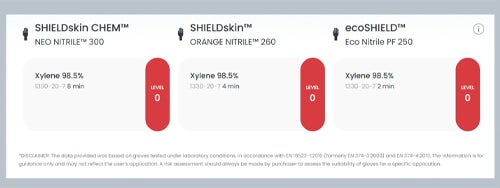
The SHIELDskin CHEM™ NEO NITRILE™ 300 glove is thicker (0.31 mm palm thickness), longer than standard gloves (300 mm), and manufactured with twinSHIELD™ technology, providing unparalleled protection for a single-use glove.
Step 3 - Sample staining: Handling acidic and alcohol-based solutions
Histology slides are then sequentially immersed in haematoxylin and eosin baths to reveal cellular structures.
After staining, samples undergo a final dehydration step, involving another round of alcohol and xylene baths.
Step 4 - Mounting and sample observation
Once all chemical processes are completed, the slices are mounted under coverslips with an appropriate mounting medium, ensuring long-term preservation of the prepared samples.
The technician can then analyse the samples under a microscope.
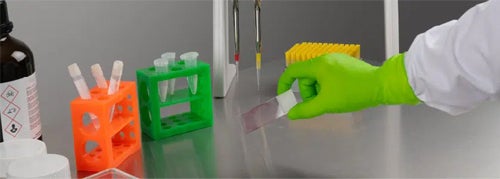
As highlighted throughout this article, while many pathology departments are now equipped with automated sample preparation systems, numerous research laboratories continue to perform these operations manually, increasing chemical exposure risks.
Formaldehyde for sample fixation and xylene for deparaffinisation pose significant risks to operators, making the selection of appropriate single-use gloves essential.
Key criteria for choosing the right gloves in histology labs:
- Gloves chemical resistance suited to the solvents used (formaldehyde, xylene, alcohols).
- Extended glove cuffs (≥250 mm) for enhanced wrist and forearm protection.
- Lowest possible AQL (ideally 0.25) for superior gloves barrier performance.
- Regular glove changes to prevent contamination.
Need help selecting the right gloves? Contact Charlotte Otéma at charlotte.otema@nordicbiolabs.se for more information and personalised recommendations.
DISCLAIMER: The information provided in this article is for guidance only and may not reflect the user’s specific application. A risk assessment should always be conducted by the purchaser to determine the suitability of gloves for a particular use case.